How to Sign Up for the X API: A Step-by-Step Guide

X’s API provides developers with a powerful tool to integrate X’s functionalities into their applications, analyze tweets, automate actions, and much more. Whether you’re building a social media dashboard, conducting research, or creating a bot, accessing the X API is essential. This guide will take you through the steps to sign up for the X API.
Step 1: Create an X Developer Account
To access the X API, you first need an X Developer account. Here’s how you can set one up:

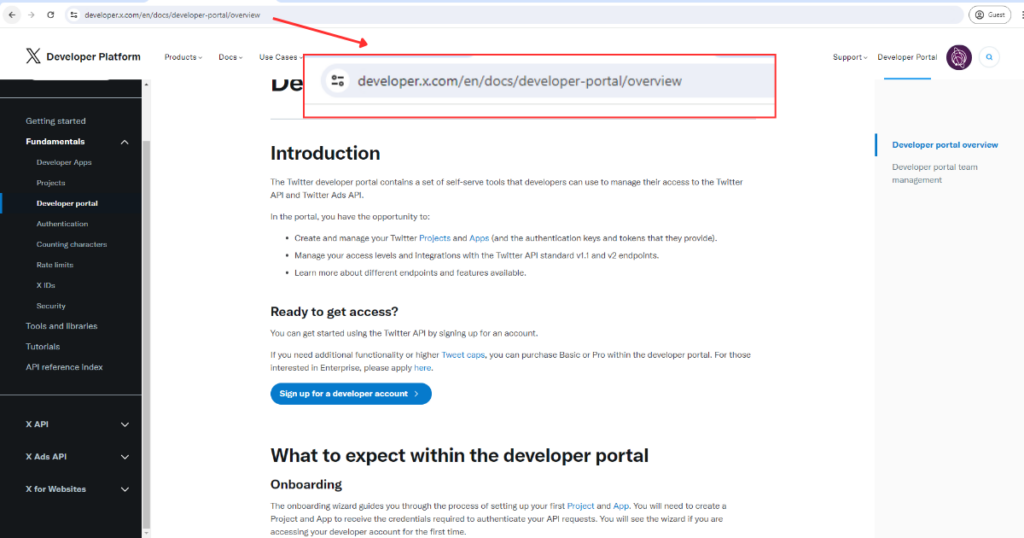
- Visit the X Developer Platform: Open your browser and go to developer.x.com.
- Sign In: Click on the “Sign In” button in the top right corner and log in with your existing X account credentials. If you don’t have an X account, you’ll need to create one first.
Step 2: Apply for a Developer Account
- Start Application: Once logged in, click the “Sign up” button to start your application for a developer account.
- Fill Out the Application: X will ask for details about how you plan to use their API. This includes providing:
- Your name and X handle.
- Primary country of operation.
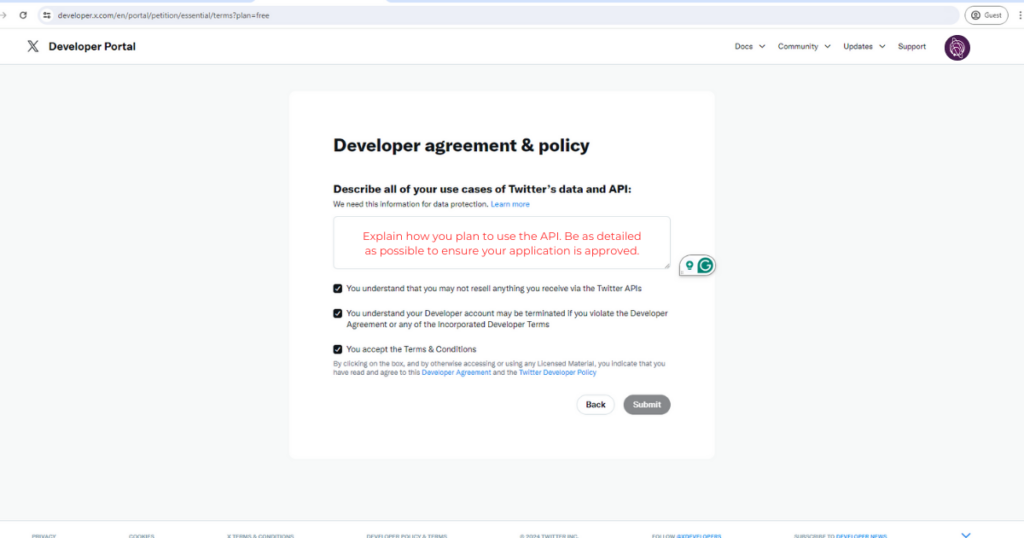
- Use case details: Explain how you plan to use the API. Be as detailed as possible to ensure your application is approved.
- Agree to Developer Agreement: Read and accept the X Developer Agreement and Policy.

Step 3: Create a Developer Project and App
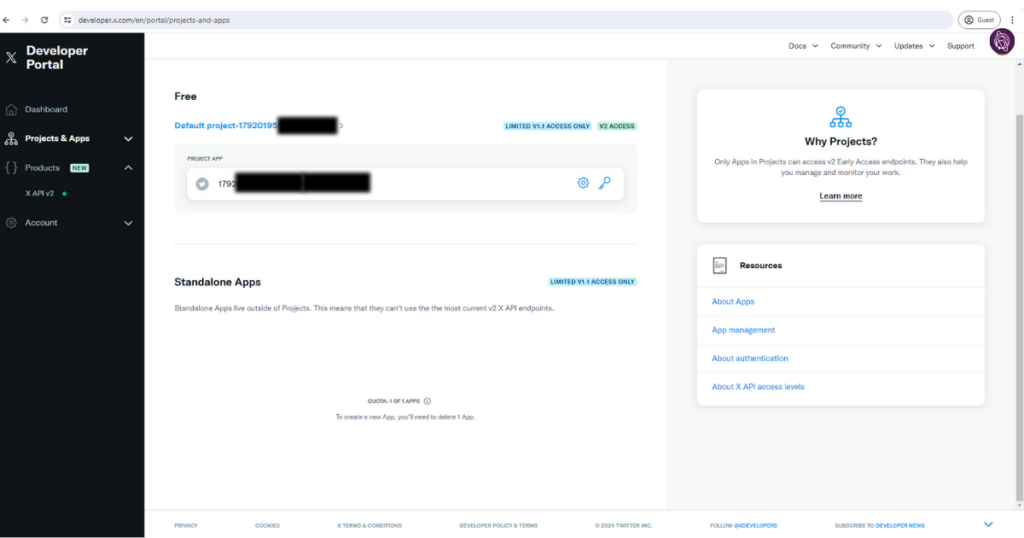
Once your application is approved, you’ll need to create a project and an app within the X Developer portal:

Free X version
Paid X version
- Create a New Project: Navigate to the “Projects & Apps” section and click on “Create Project”.
- Name Your Project: Give your project a name and provide a brief description.
- Choose a Use Case: Select the primary use case for your project, such as “Exploring the API” or “Building a product”.
- Create an App: Within your project, create a new app.
- App Details: Provide the app name, description, and website URL (if applicable).
- Permissions: Set the permissions your app needs (Read, Write, Direct Messages).
Step 4: Generate API Keys and Access Tokens
To interact with the X API, you’ll need your API keys and tokens:
- API Key and Secret: In the “Keys and Tokens” tab of your app, you’ll find your “API key” and “API secret key”. Click “Generate” to create these keys.
- Access Token and Secret: Click “Create” under “Access token & secret” to generate your access token and secret. These tokens authenticate your API requests.
Step 5: Secure Your Keys and Tokens
Your API keys and tokens are sensitive and should be kept secure. Do not share them publicly or hard-code them in your application. Use environment variables or a secure vault service to manage them.
Step 6: Explore the API Documentation
Before making API calls, familiarize yourself with X’s API documentation:
- Visit the Docs: Go to the X API documentation section.
- Understand Endpoints: Review the various endpoints and learn how to construct requests for different data types (tweets, users, trends, etc.).
- Example Requests: Try out example requests provided in the documentation to see how they work.
Step 7: Make Your First API Call
Now that you have everything set up, you can start making API calls:
- Use Postman: Tools like Postman can help you test API requests without writing code.
- Write Code: Use your preferred programming language and X’s API libraries to integrate the API into your applications.
Conclusion
Signing up for the X API opens up numerous opportunities for developers. From analyzing social media trends to automating tweets, the possibilities are vast. By following these steps, you can set up your X Developer account, create an app, and start making API calls. Dive into the documentation, experiment with different endpoints, and build something amazing with X’s data.
If you run into any issues or have questions, X’s developer forums and support are excellent resources to help you out. Happy coding!

